|
|
Tutorials for Moodle 2.0 |
Dr. Richard L. Bowman
Harrisonburg, VA, USA 22802
Moodle, as an open-source course management system, provides a large number of capabilities that may be tapped by a faculty user. Each educational institution may rename and configure Moodle as they wish. As an example, below is a screenshot of a course I taught in the Spring 2011 semester at Bridgewater College. I then restored and updated it in my own test install of Moodle (version 2.0).
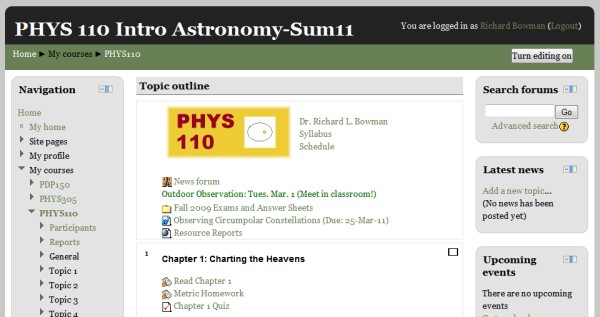
All of the screenshots in the remainder of this tutorial are from this test Moodle (version 2.0).
As a review, some of the capabilities of Moodle are:
This tutorial will not delve into these capabilities but will enable faculty to get a course set up properly for use with students. Before using this tutorial, each user should carefully read and follow the tutorial, "A Guide for New Faculty Users of Moodle," which was written for version 2.0 of Moodle
NOTE: Moodle may be used for "courses" that are not on the academic list. It is a very flexible place for discussing and sharing of ideas and resources. This tutorial, while aimed at faculty members, will also be useful for anyone wishing to set up a "course" in their institution's Moodle.
There are two major styles, and a couple of less-used styles, for the general layout of a course in Moodle. The teacher of a course must choose one of them, but it can be changed at a later date. However, so that nothing in the layout is lost, it would be good to decide up front on a style. In general one of these will be the default style for your Moodle, but the user may easily switch to the other one.
One change in Moodle 2 compared to Moodle 1.9 is the addition of a dock on many pages and the ability to move blocks to or from the dock. Note that any changes made on the pages of one course will effect the same items on other pages, including your "My home" page. You may have already tailored your "My home" page, but you may also make such changes here.
By default the dock is located on the left-side of the page. To move a block there, simply click on the small button on the upper right of a particular block to be moved. An enlarged photo of this button is shown below.
![]()
The -/+ icon will do the usual "hide" or "show" of the menu item. The next thin rectangle followed by a wider rectangle is the button to send the item to the dock.
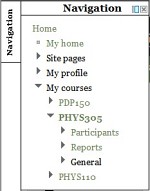
Below is how the upper-left-hand portion of the course main page shows up when the Navigation block has been moved to the dock. Hovering over the Navigation link will cause the Navigation menu to be displayed as in the right-hand screenshot below. When the menu is showing, clicking the "Undock this item" button will return the block to its original location on the page.
 |
 |
Use the dock to simplify the layout of your course page, if you think that is useful.
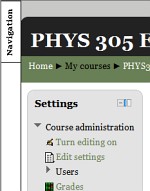
After deciding upon an organizational style for a course, the teacher must then change some settings. Move the cursor to the Administration section (on the left-hand side of the main page for the course) and click on "Edit settings." Make (or do not make) the following changes in the new window that displays.

For a more complete list of what must not be changed, may be changed and should be changed, see the tutorial, "Important Things to Remember for Moodle Users" (written for version 1.9; it will be revised for 2.0 soon).
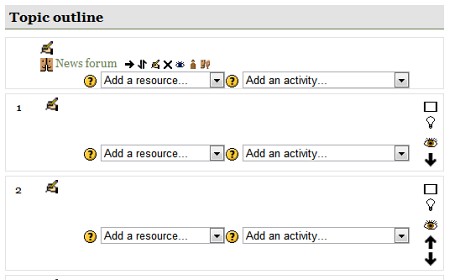
To begin building the course for your purposes, editing must be turned on. Click on the button on the upper right-hand side of the main course page. The page will be automatically redrawn, so wait until that happens. The center section of your new course page should look like the screenshot below, if you are using Topic format. If you are using Weekly format, then each section under the main one will have the dates of the week included as the first line of each entry, e.g., "30 August - 5 September.".
While no course in Moodle is ever really complete until the last class activity is finished, you can try building it completely to begin or just decide that you will build it as you go. Below is what one course has looked like after a lot of it had been built. It shows that editing (the hand-with-a-pencil icon) and even deleting (the X icon) can happen at any time.
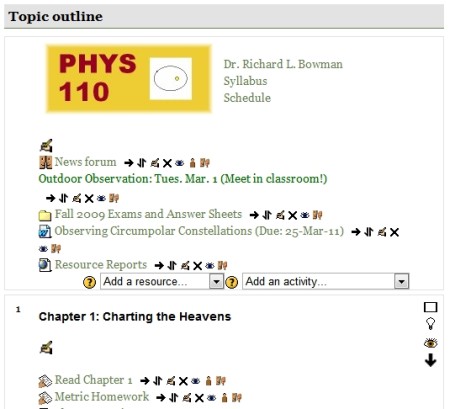
Follow the directions below to take your empty course and fill it with the resources and activities you want your students to experience.
A. Editing a Label for the Course or the Topics
Regardless of the organizational style selected, the topmost entry can be used to place general items regarding the course. Finding the "hand-with-a-pencil" graphic and clicking on it will bring up a simple web editor so that the course can be labeled. The editor that shows up is similar to what is displayed at many locations when editing a course in Moodle. Below is a screenshot of the editor.
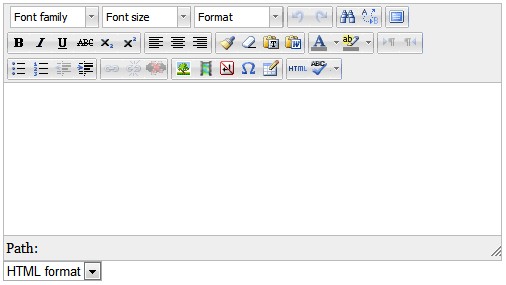
This is a powerful WYSIWYG (what you see is what you get) HTML editor, so you do not need to know HTML to use it. Simply begin by typing in the editing box below the toolbars.
NOTE: Do not forget to run the spell-checker when you are finished. In the above screenshot, this is the button with "abc" above a check mark.
Finally, click the "Save changes" button and you will be returned to the page you left.
B. Linking a Resource to the Course
Back at editing the main course page, click on the arrow by the the text box labeled "Add a resource" to see all the possibilities. Resources are by definition text or web pages of information, files (documents, images, etc.) and links to web sites. Additional resources may be added to each topic or week of the course.
The possible resource types include the following:
C. Adding an Activity to the Course
After you have explored adding resources, explore adding an activity. Activities by definition include anything requiring students to respond to it. For example, an activity could be an assignment where students write a paper, a simple or more complicated quiz, or a question in a forum to which they need to respond. Select one of these options and check it out.
D. Rearranging Resources and Activities on the Course Main Page
Clicking the double-headed arrow next to an item causes Moodle to redraw the main page of the course with empty dashed rectangles wherever the item may be placed. Clicking on on of the rectangles will cause Moodle to update itself with the item moved to that new location. So do not worry to much to begin with about what order you might want resources or assignments to appear in Moodle. They can always be moved.
E. Getting News to All Students in the Course
One important default entry in all courses in Moodle is the "News forum." DO NOT change its setting, but DO use it! By default all students and teachers in a particular course are subscribed permanently to the "News forum." That means that every message that is posted through this forum will be distributed through email to all students and teachers in the course. (This is one important reason why students need to check their school email account every day and maybe several times a day!)
The simplest way to access this forum is to move to the "Latest news" block on the right-hand side of the main course web page and click on the link "Add a new topic...." In the new window that shows up, enter the subject of the email and the text of the message you wish to send to all students (including any graphics, links to files or web-based material). A file may also be attached. Finally click "Post to forum."
NOTE: If you select the checkbox after the words "Mail now" which are right above the "Post to forum" link, the message will be sent within a minute or two as Moodle will immediately calls up its email program. If this box is not checked, the message will not be sent for 30 minutes during which time the sender may come back and edit the message prior to it be sent.
In addition to a large number of help files that can be accessed through the help question mark graphics liberally scattered throughout Moodle, there are also Moodle docs for nearly every page that one can view in Moodle. Links to these docs are usually placed at the bottom of each page with which they are associated.
The main page of Moodle Assists (at Ed Tech by Bowman) gives numerous resources for learning to use Moodle. Some of these are from www.Moodle.org while others are tutorials from other sources. A few books are also referenced there.
If you have any questions or need additional assistance, contact your local help center or email Richard Bowman @ richard.bowman@edtechbybowman.ne .
©2009-11; Dr. Richard L. Bowman
![]()
Return to Ed Tech by Bowman Home
Created and maintained by: Richard L. Bowman ( richard.bowman@edtechbybowman.net ); last updated: 5-Sep-11.