Files for Mobile Devices
What should one keep in mind when composing files for mobile devices such as smart phone and talbets?
I have checked out the files I created for the Kindle to see how they displayed on smart phones such as the iPhone or those with an Android operating system. My suggestions are summarized below.
- Text files displayed fine. (The user may have to adjust the default font size to read long documents with ease.)
- PDF files displayed well if they were generated with 20 point or larger fonts.
- Photos in PDF files should all be oriented so that they are viewed correctly when the page is in "portrait" orientation since many mobile devices will automatically re-orient the viewed page when the device is turned by 90o.
- Web pages that are constructed with a flexible format (not a rigid, set-in-ice format). That is, the width of the page should not be coded in a certain pixel size.
In other words, if one worked with files for the keyboard Kindle, then those files would most likely also work on other tablets and mobile devices such as smart phones.
January 5, 2012
Easy File Creation for Kindles (IV)
By accident I discovered that the Kindle operating system does support one other file format, but only for a single purpose. It will unpack a zipped file, but only if it has photos of certain file types in the compressed file. (In a previous post, I discussed how to embed photos in a PDF file for viewing on a Kindle. Which method you use is up to you.)
NOTE: While the following procedure works on my keyboard Kindle 3, I have not found this documented anywhere else. So treat this as a feature that might work for you, but give Amazon some slack if you find difficulties with it.
Photos for the Kindle (Zipped)
Supported Photo File Types: By experimentation I have found that jpg, gif and png file formats work fine but bmp does not. I have not tried other formats.
A. Modify Your Photos or Graphics
Open your photos or graphic file in an editor such as IrfanView. Any editor that gives you control over the size of the photo will work, but a basic program such as IrfanView allows one to know and change very precisely the width and height of the photo in pixels (dots) and to save the file in many different formats with a lot of control over the quality of the output.
First, crop and adjust the color and sharpness of your photo as you think best.
Second, resize the final photo to something much smaller than your camera produces. In my sample file, I used photos that I had resized to 600 X 400 pixels (or 400 X 600 pixels).
B. Move the Photos into a Zipped Folder
Copy and paste all of the photos you want to move to your Kindle into one folder on your computer. Then select all of them and send them to an archived or zipped folder. In Windows 7 you do this by right-clicking on the selected photos and then choosing the options "Send to/Compressed (zipped) folder."
C. Transfer the Zipped File to a Kindle.
To load your zipped file to a Kindle, follow the directions I gave a couple days ago.
D. View a Sample Zipped Photo File.
Here is a link to a sample file I have created with all three supported file types. The photo of my wife, Elsie, looking at a bouquet is in jpg format, the one of two of our grandchildren is in png format, and the one of my Kindle is in gif format. Download the sample file and save it to your computer. Then copy it to the documents folder of your Kindle.
HINT #1: When you go to view the photos on a Kindle, please give the Kindle enough time to handle the files (unzip the images and get them ready for displaying). This can take a half-minute or more.
HINT #2: While the photos are being viewed on the Kindle, check out the options in the menu that is available at that time. The options are worth experimenting with.
--©2012, Richard L. Bowman
January 4, 2012
Easy File Creation for Kindles (III)
The Kindle's operating system uses HTML code to do its formatting on the screen. So a user can display a web page fairly easily. However, not all HTML features are fully supported, so follow the instructions below whether you are writing a web page form scratch for the Kindle or modifying an exist web page for copying to and displaying on a Kindle.
HTML Files for the Kindle
NOTE: One important fact to always keep in mind is that the Kindle does not understand the file extension ".htm" or ".html". The web pages must always have their extensions changed to ".txt" before being copies to the documents folder on the Kindle.
A. Create the Web Page File.
Open an existing web page file in a WYSIWYG web page editor such as Microsoft Office SharePoint Designer 2007. (This program is a free download from the Microsoft web site, if you do not already have such an editor installed on your computer. Note that the 2010 version is a different "beast" entirely and is not to be used as a stand-alone web page editor.)
OR, open your web page editor and start with a blank web page.
Use any of the following formatting items as you construct or modify your web page.
- Heading 1 <h1>, Heading 2 <h2> or Heading 3 <h3> can be used to create the page title and section headings in the web page.
- Italicized and bolded text may be used for highlighting.
- Centered text may be used, but use it carefully. Test-style parameters are not interpreted by the Kindle operating system, but the align parameter can be set (align="center") in any tags in which it is allowed, such as <p> and <h2>. The web page author may have to do this directly in the HTML code.
Do not use any of the following formatting items on your web page.
- Do not use pictures or graphics.
- Do not use tables. (Information can be given in tabular form by using a "break" <br> at the end of each line of data and using spaces to align data.)
- Do not use bulleted lists. (To mimic a numbered list, begin each paragraphs with a number followed by a period and a space.)
- Do not use underlined text. (Make the text bold or all caps to highlight it.).
- Do not use horizontal lines.
HINT #1: Since the Kindle automatically indents paragraphs, if a new line or paragraph should be aligned with the right-hand margin, precede it with a "break" <br>. In SharePoint Designer a "break" can usually be inserted by holding down the shift-key while pressing the enter-key.
HINT #2: The "break" code is often used to insert a single blank line. However, if that is what you wish to do on a web page to be displayed on a Kindle, then make certain to insert a black space character in front of the "break" code. Otherwise the Kindle may ignore the "break" code completely.
HINT #3: Before transferring the file to the Kindle, do not forget to change its file extension to ".txt".
B. Transfer the File to a Kindle.
To load your web page file unto a Kindle, follow the directions I gave a couple days ago. If possible, always view it in a Kindle or some other mobile device to see how it appears.
C. Load a Sample Web Page File.
Here is a link to the syllabus modified as instructed above for the PHYS 305 Modern Physics that I taught fall semester 2011. Right-click that link and select "Save Target As" to save the text file. This may then be copied to the documents folder of a Kindle and viewed in the Kindle, or its extension may be changed back to ".html" and opened in a web editor to see how it looks there.
Here is the original syllabus as a web page.
--©2012, Richard L. Bowman
January 2, 2012
Sample PDF Files on a Kindle
To illustrate the procedure of generating a PDF file that will display nicely on a Kindles, I generated two sample files. The first (a course syllabus) is displayed below. The second example shows how to import and display photos on a Kindle (using a PDF file).
Making a PDF File from a Web Page
| I took the syllabus for
PHYS 305 Modern Physics that I taught fall semester 2011 and made it into
a PDF file using Word.
The first page as it displays on my
Kindle 3 is shown at right. Because of
my visual handicap, I used a font size
of 20 points. But even then the font was
not too large. 1. Open the web page in Word or highlight, copy and paste the web page into Word.. 2. Enlarge the font size to at least 20 points. (See my previous blog entry for directions on doing this.) 3. Save the modified file as a PDF file. 4. Peruse the PDF file when it opens to make sure that all photos, diagrams, and tables are displaying as they should be. 5. Finally copy the PDF file to the document folder in Kindle and view the file on a Kindle, if at all possible. |
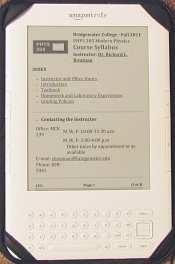 A course syllabus (in PDF format) displayed in a Kindle 3. |
Here is a link to the syllabus in PDF form and here it is as the original web page. They both work equally as well. BUT remember, if you are viewing the PDF file on a computer, the font will look gigantic on a computer but will not look nearly as large on a Kindle or other mobile device.
Porting Photos to a Kindle
Saving photos directly to the document folder of a Kindle does not make them visible on that Kindle, but inserting photos into a Word document that is then saved as a PDF will display superbly (in black and white) on a Kindle.
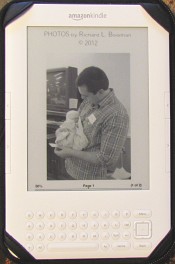 A photo (in a PDF file) displayed in a Kindle 3. |
1. Open a new document
in Word. 2. Insert as many photos as you wish with one per page. Place each one with the short side of the photo parallel to the 8 1/2 inch side of the document. (The images at the left and right show photos of two orientations but both aligned the same way. This will maximize the size on the Kindle screen.) 3. Add any text you desire (in a 20-point font). 4. Save the modified file as a PDF file. 5. Finally copy the PDF file to the document folder in Kindle and show your photos to the world.. |
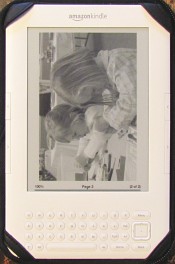 Another photo (in a PDF file) displayed in a Kindle 3. |
With this procedure, you can display any photograph on a Kindle regardless of its format, as long as Word can handle it. You may save and view the photo file that I made to test out this procedure.
--©2012, Richard L. Bowman
January 2, 2012
Easy File Creation for Kindles (II)
Most mobile devices (e-readers, smart phones, etc.) can display pdf files.
ACCESSIBILITY REMINDER: If you are creating pdf files for such devices, keep in mind that in order to make these files easier to read (without zooming in), always make the font size fairly large. In my experience (and I do have a visual handicap), the creator should always use a font that is at least 20 points in size.
PDF Files for the Kindle
Many people like to create PDF files since the formatting is retained regardless of the device it is viewed with. That is a good attribute, but this fixed format becomes a liability when the user wants to change the size of the font being displayed. It cannot be changed! But for those who wish to create a PDF file for the Kindle (or other device), here are the directions and hints.
A. Create the PDF File.
Since Microsoft Office 2007, creating PDF files has been very easy. Simply open the file in Word, and save it as a PDF file. (This can be a web page as well as a document created in Word.) But please follow the hints below.
HINT #1: For readability, change the font size to at least 20 points. The easiest way to do this in Word is to "Select All," and then press the "Grow Font" button several times. (If the default font had a size of 12 points, then pressing the button four times will result in a size of 20 points.) Click on the main text of the document to ascertain the actual size you have arrived at and repeat the procedure as necessary.
HINT #2: Change the Font Face to either Cambria (a serif font) or Arial (a sans serif font). Don not use the Times New Roman font. While a PDF created with Times New Roman looks good on a computer, it does not display consistently on a Kindle. Other fonts may work, but I have only tried these three.
HINT #3: When the PDF is viewed after being "Published," pay special attention to how tables are displayed. They may need to be resized or re-constructed to read well after the text size has been increased. If necessary simply correct the document in Word and re-save it as a PDF file.
B. Transfer the File to a Kindle.
To load your PDF file unto a Kindle, follow the directions I gave yesterday. If possible, always view it in a Kindle or some other mobile device to see how it appears.
--Richard L. Bowman
January 2, 2012
Sample Text File on a Kindle
| To illustrate the
procedure of generating a text file that
can be readily displayed by Kindles, I
took the blog entry from yesterday and
made it into a text file using Word.
The first page as it displays on my
Kindle 3 is shown at right. Since I have
a visual handicap, I use a relatively
large font size on my Kindle. BUT this
is the advantage of a text file. Each
user can adjust the font size to suit
their needs. Accessibility issues are
becoming more important to higher
education. Directions for Making the Text File 1. Highlight and copy the web page that will be converted into a Kindle text file. 2. Pasted the copied part of the web page into Word. 3. Added a blank line between each paragraph and where appropriate changed some headings into all uppercase to make the headings stand out. 4. Saved the modified file as a text file. 5. Opened the text file in Notepad to see how it looked and made any final corrections there. 6. Finally copy the text file to the document folder in Kindle and view the file on a Kindle, if possible. |
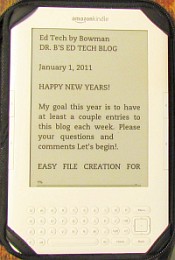 The blog entry from yesterday converted to a text file and displayed in a Kindle 3. |
Here is a link to the text file that was created from yesterday's blog entry. If you have a Kindle, save the file and copy it to your Kindle and see how it displays. Try changing the font size and see how it seamlessly displays well in all font sizes. Also try moving from the portraint window to the landscape window, and again watch how it makes this change without difficulty.
HINT: By pasting the copied web page into Word and then saving it as a text file, I was able to preserve the numbering in my bulleted list of directions for copying a file to the Kindle's document folder. If I had pasted it directly into Notepad, that numbering would have been lost.
--©2012, Richard L. Bowman
January 1, 2012
Easy File Creation for Kindles (I)
A number of educators have been discussing how to use mobile devices, such as e-book readers, in their classrooms. (I would like to use the broader category of "use with a class" because this does not limit the discussion to only how such devices are used in a particular room) So for the next few days, I will be giving some how-to guidance on making files that can be downloaded by students to their e-readers and read anywhere they take their mobile devices. Much of what I report for the Kindle will be applicable with a bit of trial-and-error with other e-readers.
Text Files for the Kindle
The simplest way to create a file that can be transferred to and read on a Kindle is to generate a text file.
A. Create the Text File.
Try opening a Word document or other word processing file, such as a syllabus, in its associated program and save it as a text file. On a Windows computer make certain that the extension is ".txt" so that Kindle will recognize it immediately. Or you may open up your favorite word processing program and begin from scratch to create a document.
HINT #1: The only formatting that can be done with a plane text document is: using spaces instead of tabs and using all caps or double quotation marks to set off words or phrases that should be highlighted.
HINT #2: Nothing should be centered by trying to use spaces since each user will be selecting their own font size on their particular device.
HINT #3: To enhance readability, skip a line between each paragraph and indent each paragraph with five spaces (an old typewriter format; anyone remember that?).
HINT #4: If your original had tables, then you must use spaces to try and get a similar formatting, but for those users who use large-sized fonts, do not make your lines too long or they will wrap in the e-reader and destroy your careful formatting.
So after you have saved your file as a text file, open it in a plain text editor (for example Notepad in Windows) and adjust it to make it more readable as the hints above suggest.
Finally, save it to your web site or into your course in your course management system, such as Moodle.
B. Transfer the File to a Kindle.
Most Kindle users will never have placed a file on their Kindle from their PC, so you may want to share these quick instruction with your students or give them a link to this page.
- Download the file from the web to a folder on your PC.
- Use the micro-USB cable provided with your Kindle e-reader to connect the PC to the Kindle. (While I do not have a Kindle Fire, my understanding is that all users must buy their own at Amazon, or use one that they already have from another product.)
- Turn on the Kindle, if it did not start up automatically, and wait for your PC to ask you what to do with the new device that is now connected. Select the option "Open folder to view files."
- Then double-click on the Documents folder to open it. Even if you have used "collection" (folders) on your Kindle, they will not show up that way in the "documents" folder. All files are dumped together in this folder. Do nothing with the files already in that folder.
- Go to the folder on your PC where you have placed the file you wish to upload to your Kindle. Copy it. Move to the Kindle "documents" folder and paste it into that folder.
- Finally go to the Computer icon on your PC, and you will see your Kindle listed as one of the storage devices. Right-click on the icon for your Kindle, and select "Safely Remove." When a message pops up telling you "Safe to Remove Hardware," simply disconnect your Kindle from the USB cable. Wait until your Kindle goes back to its normal mode, and you will be ready to locate the file in your Home menu and read it.
- HINT: After loading the file into your Kindle, best practice would be to create a "collection" for each course and place all materials into their appropriate course folder.
My plans are to have syllabi and other course materials for my spring semester in both web-ready format and e-reader format. Give it a try and let me know what you found. Next time I will discuss making PDF files for e-readers.
--©2012, Richard L. Bowman